Personal menu
Search
RSS

Blog posts of '2025' 'February'

How to Use a Milwaukee Press Tool Like a Pro

Introduction

What Is a Milwaukee Press Tool?

A Milwaukee press tool is a professional-grade device designed for connecting pipes using press fittings. It eliminates the need for welding, soldering, or threading, making plumbing and mechanical installations faster and more efficient.

Why Mastering It Matters

Mastering the Milwaukee press tool ensures efficiency, safety, and precision in various applications, from plumbing to HVAC systems. It enhances productivity while reducing installation errors, ensuring long-lasting, reliable pipe connections.

Getting Started with a Milwaukee Press Tool

Key Features and Benefits

  • Speed & Efficiency: Reduces installation time significantly.

  • Durability: Built with high-quality materials for longevity.

  • Ergonomic Design: Lightweight and user-friendly for extended use.

  • Versatility: Compatible with various pipe materials and fitting sizes.

  • Battery-Powered Convenience: Allows for cordless operation in tight spaces.

Understanding Different Milwaukee Press Tools

Milwaukee offers a range of press tools, including:

  • M12 Force Logic Press Tool: Ideal for small-diameter applications.

  • M18 Force Logic Press Tool: Suitable for larger-scale installations.

  • Long-Throw Press Tool: Designed for high-force applications.

Essential Safety Guidelines

Proper Handling Techniques

  • Always use both hands for better control.

  • Keep fingers away from the pressing jaws.

  • Ensure the tool is in good working condition before use.

Must-Have Safety Gear

  • Safety Gloves: Protect hands from sharp edges and pressurized fittings.

  • Eye Protection: Shields against flying debris and accidental fluid leaks.

  • Protective Clothing: Prevents burns and abrasions.

Step-by-Step Guide to Using a Milwaukee Press Tool

Setting Up Your Workstation

  1. Choose a stable work surface.

  2. Ensure proper lighting.

  3. Arrange tools and accessories for easy access.

Loading the Press Tool Correctly

  1. Select the appropriate jaw or ring size.

  2. Securely attach the press jaw to the tool.

  3. Align the fitting properly before pressing.

Executing the Perfect Press

  1. Insert the pipe into the fitting.

  2. Position the press jaw over the fitting.

  3. Activate the tool and apply steady pressure until the cycle completes.

  4. Inspect the connection for proper sealing.

Best Practices for Efficiency

Maximising Precision and Accuracy

  • Use a deburring tool to smooth pipe edges before pressing.

  • Mark pipe insertion depth to ensure proper fitting placement.

  • Perform a test press on a scrap pipe before starting a project.

Common Mistakes and How to Avoid Them

  • Using the wrong jaw size: Always check specifications before pressing.

  • Pressing incomplete connections: Ensure pipes are fully inserted into fittings.

  • Neglecting maintenance: Clean and lubricate the tool regularly.

Milwaukee Press Tool Maintenance

Routine Cleaning and Care

  • Wipe the tool after each use.

  • Store in a dry place to prevent corrosion.

  • Check battery levels before each job.

Troubleshooting Common Issues

IssuePossible CauseSolution
Tool not pressing properlyWorn-out press jawsReplace jaws
Battery not holding chargeOld or damaged batteryReplace battery
Press tool overheatingOveruse without breaksAllow cooling time

Comparing Milwaukee Press Tools to Other Brands

Key Differences and Advantages

  • Superior Battery Life: Lasts longer compared to competitors.

  • Enhanced Durability: Built for rugged job site conditions.

  • Ergonomic Design: Reduces user fatigue.

Why Professionals Prefer Milwaukee

  • Trusted brand with proven reliability.

  • Comprehensive warranty and customer support.

  • Wide range of compatible accessories.

Pro Tips for Advanced Users

Enhancing Speed Without Sacrificing Quality

  • Organise fittings and pipes before starting work.

  • Use Milwaukee's One-Key technology for tool tracking and optimisation.

  • Train apprentices on proper press techniques to improve workflow.

Customising Your Tool for Different Applications

  • Attach different jaw sizes based on pipe dimensions.

  • Invest in extended battery packs for longer usage.

  • Use Milwaukee’s crimping rings for high-pressure applications.

Applications Across Industries

How Plumbers Use Milwaukee Press Tools

  • Joining copper and PEX pipes in residential and commercial plumbing.

  • Reducing installation time by eliminating soldering.

Electrical and HVAC Applications

  • Securing conduit connections.

  • Pressing refrigerant lines for HVAC installations.

Milwaukee Press Tool Accessories and Attachments

Must-Have Add-ons for Better Performance

  • Extended jaws for larger pipes.

  • LED work light attachment for low-light environments.

  • Belt clips for hands-free carrying.

How to Choose the Right Accessories

  • Consider the pipe material and size.

  • Ensure compatibility with your Milwaukee model.

  • Opt for Milwaukee-branded accessories for best performance.

Environmental Benefits of Using Milwaukee Press Tools

Reducing Waste and Energy Consumption

  • No need for consumables like flux or solder.

  • Lower electricity usage compared to welding equipment.

Sustainable Practices in Construction

  • Minimises hazardous waste.

  • Promotes leak-free connections for better water conservation.

Cost Analysis: Is a Milwaukee Press Tool Worth It?

Initial Investment vs. Long-Term Savings

  • Higher upfront cost compared to traditional tools.

  • Saves time and reduces labor costs.

  • Lower maintenance expenses.

Frequently Asked Questions (FAQs)

How do I choose the right Milwaukee press tool for my needs?

Consider pipe sizes, application type, and battery life requirements.

Can I use a Milwaukee press tool for different pipe materials?

Yes, Milwaukee press tools work with copper, PEX, and stainless steel pipes.

What is the lifespan of a Milwaukee press tool?

With proper maintenance, they can last over 10 years.

Do Milwaukee press tools require special maintenance?

Regular cleaning, battery checks, and occasional jaw replacements are needed.

Are there different sizes of press jaws available?

Yes, Milwaukee offers a range of press jaws for various pipe diameters.

Where can I buy genuine Milwaukee press tool accessories?

Purchase at your Milwaukee Press Tool from Press It today.

Conclusion

Mastering a Milwaukee press tool ensures efficiency, accuracy, and cost savings in various industries. By following best practices, maintaining your tool, and investing in the right accessories, you can maximise its performance and longevity.

Shop Milwaukee Press Tools Now

Milwaukee M12 Sub Compact Force Logic Hydraulic Press Tool | Profile-M | Incl. 3 Jaws

Milwaukee M18 Force Logic Press Tool | Profile-M | Incl. 3 Jaws |


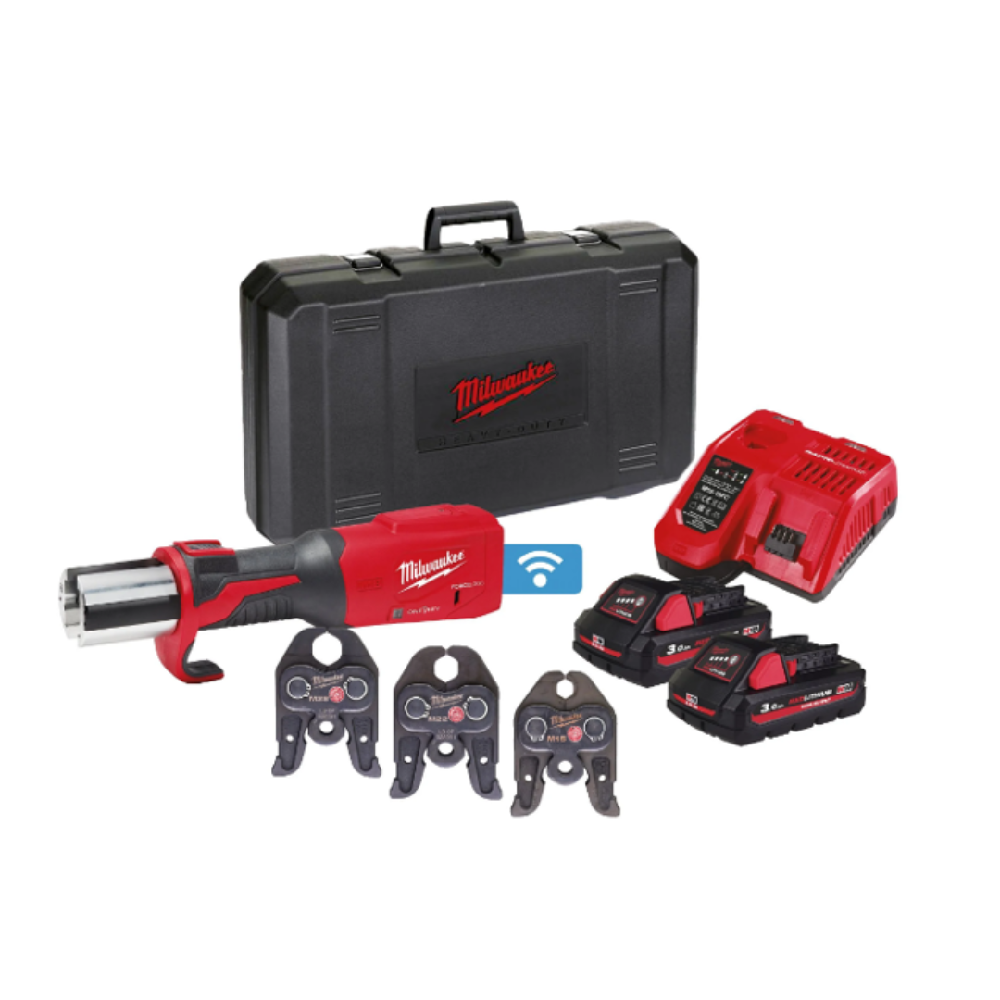
View our full range of press tools available.

5 Signs You Need to Upgrade Your Copper Fittings Today

The Importance of Copper Fittings in Plumbing Systems

Copper fittings play a crucial role in plumbing systems, ensuring water flows efficiently throughout a home or business. These fittings connect pipes, regulate pressure, and contribute to the overall reliability of plumbing infrastructure. While copper is known for its durability and corrosion resistance, over time, even the highest-quality fittings can degrade, leading to potential issues.

Why Copper Fittings Are Widely Used

  • High durability and longevity

  • Resistance to corrosion and bacterial growth

  • Suitable for both hot and cold water applications

How They Contribute to a Reliable Plumbing System

  • Provide secure and leak-free connections

  • Help maintain consistent water pressure

  • Support efficient water distribution

Sign #1: Frequent Leaks and Water Damage

One of the most noticeable indicators that it’s time to upgrade your copper fittings is persistent leaks. If you find yourself frequently repairing leaks, the fittings may have reached the end of their lifespan.

Causes of Leaky Copper Fittings

  • Corrosion due to prolonged exposure to moisture

  • Poor installation or improper sealing

  • Damage from fluctuating water pressure

Identifying Water Damage in Your Home

  • Damp spots on walls or ceilings

  • Mold and mildew growth

  • Sudden increase in water bills

Short-term vs. Long-term Repairs

Short-term fixes like tightening or resealing joints may provide temporary relief, but upgrading to new, high-quality copper fittings ensures long-term reliability and prevents recurring issues.

Sign #2: Discoloured or Corroded Pipes

Discoloration on your copper pipes is a strong indication that they are deteriorating and need replacement.

Understanding Copper Corrosion

Corrosion occurs when copper reacts with oxygen, water, and other environmental factors, leading to weakened fittings and potential leaks.

Green and Black Marks: What They Indicate

  • Greenish-blue patina: A sign of oxidation, common in older pipes

  • Black streaks: Indicate severe corrosion that could lead to leaks

How Corrosion Affects Water Quality

  • Metallic taste in drinking water

  • Possible contamination from corroded materials

  • Reduced water flow due to sediment buildup

Sign #3: Low Water Pressure Issues

A noticeable drop in water pressure could be linked to deteriorating copper fittings.

Connection Problems Leading to Pressure Drops

Over time, mineral deposits and corrosion inside fittings can restrict water flow, leading to reduced pressure.

Detecting Water Pressure Decline

  • Weak water flow from taps and showers

  • Inconsistent pressure throughout the home

  • Slow-filling appliances such as washing machines

When to Replace vs. Repair

If multiple fittings are affected, upgrading them is the best long-term solution rather than making frequent repairs.

Sign #4: Unusual Noises from Your Pipes

Unusual noises coming from your plumbing system may indicate failing copper fittings.

Banging, Whistling, and Rattling: What They Mean

  • Banging sounds: May result from loose or worn-out fittings

  • Whistling noises: Indicate water flow restriction due to buildup inside fittings

  • Rattling: Often caused by poorly secured pipes and fittings

Airlocks and Copper Fitting Deterioration

Air pockets trapped in pipes can cause vibration and unusual sounds, suggesting the need for replacement.

How New Fittings Reduce Pipe Noises

  • Improved sealing reduces water hammer effects

  • New fittings ensure smooth water flow, minimizing turbulence

Sign #5: Higher Water Bills Without Explanation

A sudden rise in your water bill may indicate hidden leaks due to failing copper fittings.

Hidden Leaks and Water Waste

Even small leaks can lead to significant water waste over time.

Faulty Fittings Leading to Inefficiency

Deteriorated copper fittings may cause small, unnoticed leaks that add up to higher utility costs.

How Upgraded Fittings Save Money

  • Preventing leaks reduces water waste

  • Improved efficiency lowers overall plumbing repair costs

The Risks of Delaying Copper Fitting Upgrades

Delaying necessary upgrades can lead to serious consequences, including:

  • Structural damage from persistent leaks

  • Health hazards due to water contamination

  • Increased costs for emergency repairs

How to Choose the Right Copper Fittings for Your Upgrade

Different Grades of Copper Fittings

  • Type M: Thin-walled, best for low-pressure applications

  • Type L: Medium thickness, suitable for residential plumbing

  • Type K: Thickest walls, ideal for underground installations

Compatibility with Existing Plumbing Systems

Ensure new fittings match your existing pipes in terms of size, material, and connection type.

Cost vs. Long-Term Benefits

Investing in high-quality fittings may cost more upfront but offers long-term savings through increased durability.

Professional vs. DIY Copper Fitting Replacement

When DIY Replacement is an Option

  • Minor repairs with accessible pipes

  • Basic fitting replacements with proper tools

Benefits of Hiring a Professional

  • Expertise in handling complex plumbing systems

  • Proper sealing and installation techniques

Tools Required for Proper Installation

  • Pipe cutter

  • Soldering kit

  • Adjustable wrench

Best Practices for Maintaining Copper Fittings

Regular Inspection Tips

  • Check for discoloration and leaks

  • Monitor water pressure changes

Preventative Maintenance to Reduce Corrosion

  • Install water softeners to reduce mineral buildup

  • Use protective coatings on exposed pipes

Cleaning Methods to Prolong Lifespan

  • Vinegar and baking soda for light cleaning

  • Commercial copper cleaners for heavy corrosion

How Copper Fitting Upgrades Improve Your Home’s Value

Upgrading fittings enhances plumbing efficiency, boosting your home’s resale value.

Enhancing Plumbing Efficiency

  • Reduces maintenance issues

  • Prevents costly emergency repairs

Boosting Property Resale Value

  • Buyers prefer homes with updated plumbing

  • Increases overall home reliability

Long-Term Cost Savings

  • Reduced water waste

  • Fewer repair costs

Frequently Asked Questions (FAQs)

  1. How long do copper fittings last?

    • Typically, 20-50 years, depending on water quality and maintenance.

  2. Can I mix copper fittings with other materials?

    • Yes, but use appropriate connectors to prevent corrosion.

  3. What are the signs of a failing copper fitting?

    • Leaks, discoloration, and water pressure issues.

  4. How can I prevent corrosion in copper fittings?

    • Use water softeners and inspect fittings regularly.

Conclusion

Upgrading your copper fittings ensures a reliable plumbing system, improves water efficiency, and prevents costly repairs. Don’t wait—upgrade today!

Pick up your Copper Press Fittings at Press It Today

Conex B Press Water Straight Coupler Coupler 15mm


Pegler Xpress Water 90degrees Bend 22mm

Pegler Xpress Water 90degrees Bend 22mm

Conex B Press Water Equal Tee 15mm

Conex B Press Water Equal Tee 15mm

Shop our wide range of Copper Press Fittings now.